Safety gear
Tyre Tread Depth: Check Wear Before Buying Replacements
By Samveg Jain · Updated 22 October 2026 · 6 min read
Some links on this site may be affiliate links. If you buy through them we may earn a commission, at no extra cost to you. It never changes what we recommend. How this works.
Quick answer
Check the main tread grooves across and around every tyre with a suitable gauge, and inspect its wear indicators and physical condition. Uneven wear, damage or tread near its replacement limit calls for professional advice.
Check tyre tread with a suitable depth gauge in several places across and around each tyre, then examine wear indicators, sidewalls and wear patterns. A tyre can need replacement because of damage or uneven wear even when one groove looks deep. Do not rely on a coin test or a single reading to decide whether it is fit for a long journey.
Find the main grooves and wear indicators
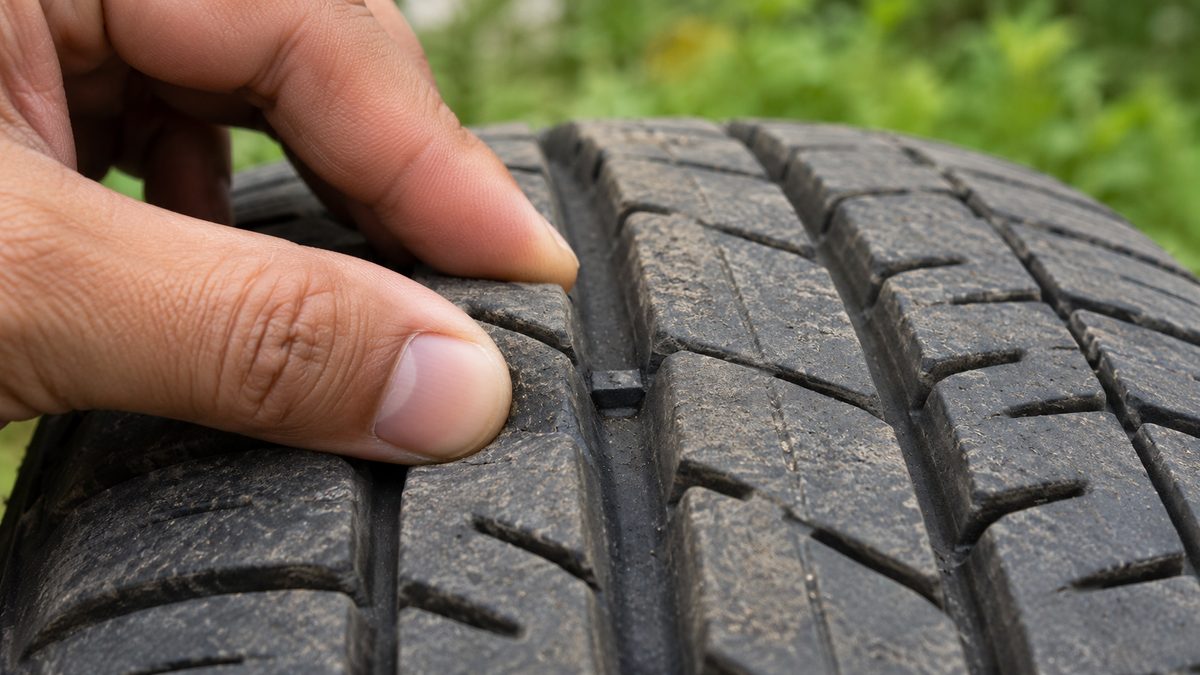
Park on firm, level ground, secure the vehicle and inspect only areas you can reach safely. Use daylight or a torch to identify the main tread grooves. Raised wear bars sit within designated grooves; sidewall markings can help locate them. Consult the tyre maker's guidance to distinguish those bars from other moulded features in the pattern.
When the surrounding tread is level with a relevant wear indicator, arrange replacement according to the tyre and vehicle guidance. Do not assume the indicator settles every question about local requirements or wet-road suitability. For legal requirements, check the current rules where you drive through official sources. A workshop can help interpret wear before it reaches that stage.
Measure more than the easiest visible patch
Clean loose dirt from the measurement area without cutting or digging into the rubber. Set up the gauge according to its instructions, place its base flat on the tread and put the probe into a main groove. Avoid measuring directly on a wear bar, embedded stone or raised feature, which would distort the reading.
Take readings towards the inner, middle and outer parts of the usable tread where the tyre design permits, and repeat around its circumference. Record the lowest useful readings and where they occurred. If part of the tyre is inaccessible, have it inspected properly rather than treating the visible outer edge as representative of the whole tyre.
Move the car only when everyone is clear and the route is safe, then secure it again to expose another section. Do not reach behind a moving wheel or jack the vehicle merely to make a casual inspection easier. Inner edges can wear unnoticed, so ask a workshop to check them if access or lighting makes your own inspection incomplete.
Read the wear pattern before ordering rubber
Wear concentrated along one shoulder can suggest alignment or suspension issues, while wear across both shoulders or through the centre can be associated with pressure problems. These patterns are clues, not a diagnosis. Driving conditions, loading and tyre construction also affect wear. A technician should assess the vehicle before you pay for replacement tyres that could wear similarly.
A patchy or scalloped surface, vibration or a change in steering behaviour deserves attention even if the gauge readings seem acceptable. Wheel balance, suspension and tyre faults can overlap. Avoid trying to settle the cause by swapping tyres randomly. Tell the workshop when the symptom appears and whether it followed an impact, puncture repair or wheel change.
Use a condition checklist alongside the gauge
- Look for bulges, cuts, exposed cords, separation or objects penetrating the tyre. Stop using a visibly dangerous tyre and seek assistance; tread depth does not cancel structural damage or make a sidewall bulge acceptable.
- Inspect both sidewalls where accessible, including the inner side through a professional check if necessary. Kerb damage may be localised and easy to miss when the car is parked with that area facing away.
- Check for a tyre that repeatedly loses pressure. The pressure gauge guide explains measurement choices, but a gauge cannot diagnose or repair the source of a leak.
- Compare tyres on the same axle for uneven wear and specification differences. Ask about suitable matching rather than deciding from tread appearance alone, particularly if only one tyre was replaced previously.
- Inspect the spare and its instructions separately. A temporary spare can have different operating restrictions and is not a like-for-like long-term replacement for the normal road wheel.
Make pressure checks part of the investigation
Measure pressure under the conditions specified by the vehicle maker, usually before driving has warmed the tyres. Use the vehicle's pressure label or handbook for the intended load, rather than the maximum marking on a sidewall. Our inflator buying guide covers equipment for correcting pressure once you know the right setting.
Do not let air out of a warm tyre simply because its reading is higher than the cold recommendation. Recheck as instructed when conditions are appropriate. If a pressure warning returns after adjustment, find the cause. An inflator can help maintain a serviceable tyre, but repeated topping up should not become a substitute for investigating leakage or damage.
Decide what a replacement must match
Confirm tyre size, construction and the vehicle's load and speed requirements from approved information. Ask a competent tyre specialist about axle matching and any drivetrain-specific requirements before replacing only part of a set. A tyre that fits the wheel physically may still be inappropriate for the vehicle or create an unsuitable combination with the tyres left in service.
Have the underlying cause of abnormal wear corrected as part of the job. Keep the inspection findings and replacement details so you can compare wear at later checks. If a puncture is involved, the puncture kit guide explains why a temporary repair product does not establish that a damaged tyre can safely remain in use.
Keep a simple tyre condition record
Write down the inspection date, wheel position and measurements, keeping the same measuring method for later comparisons. If wheels are rotated under the vehicle maker's guidance, record their new positions so an existing wear pattern is not mistaken for a newly developing fault. Note repairs and significant impacts too. The record does not extend a tyre's safe life, but it gives a workshop more useful information than a general report that wear seems faster. Bring the car for assessment sooner if the pattern changes suddenly, even before the next planned check.
Inspect before the journey creates pressure to leave
Check tread and condition early enough to book repairs, rather than measuring in a loaded car just before departure. Add the inspection to your pre-trip mechanical checks. A deeper reading in one groove cannot justify ignoring an exposed cord elsewhere. When the result is doubtful, let a qualified tyre professional assess the whole tyre before travel.
What to look for when you buy
Tread depth gauge
A readable scale, a stable base and a probe suited to tyre grooves.
Inspection torch
Enough light to examine grooves and sidewalls without crawling under the car.
Correct replacement tyre
The vehicle-approved size, load and speed specification, with suitable axle matching.
Frequently asked questions
Can I judge tread from a photograph?
A photograph may show damage but cannot reliably measure groove depth. Use a suitable gauge and direct inspection.
Does plenty of tread mean an old tyre is safe?
No. Age, storage, cracking and other damage also matter. Follow the vehicle and tyre makers? inspection and replacement guidance.
Should I rotate tyres to hide uneven wear?
No. Find the cause first and follow the permitted rotation pattern only after the tyres are assessed as serviceable.
Does a spare need checking if it has never been used?
Yes. Check condition, age guidance, pressure and any temporary-use restrictions even when its tread looks unused.
More guides

Safety gear
Car Safety Around Firecrackers: Parking for Diwali
A practical parking and inspection plan for Indian car owners before and after Diwali celebrations.

Safety gear
Night Driving Checklist: Lights, Glare, Fatigue and Kit
Prepare for an evening drive with checks for lights, glass, mirror glare, fatigue and breakdown equipment, plus clear reasons to delay.
Safety gear
Reverse Parking Cameras vs Sensors: A Fitment Guide
Compare reversing cameras and parking sensors by coverage, installation and limits. Choose a system that supports direct observation.