Car care gear
Headlight Restoration Kits: Repair or Replace?
By Samveg Jain · Updated 26 October 2026 · 5 min read
Some links on this site may be affiliate links. If you buy through them we may earn a commission, at no extra cost to you. It never changes what we recommend. How this works.
Quick answer
A restoration kit may improve external haze on a compatible plastic headlight lens. It cannot fix internal damage, cracks, failed lighting components or an incorrectly aimed beam.
A headlight restoration kit can help when a compatible plastic lens has haze or yellowing on its outside surface. It cannot repair a cracked housing, internal moisture damage, failed components or poor beam alignment. Identify the fault first, then decide whether surface restoration or a workshop repair is appropriate.
Cloudy headlights deserve attention before a winter highway journey, but a clearer-looking lens is only part of the check. This is general maintenance information. If visibility is poor or the lamp's condition is uncertain, have a competent workshop inspect it before relying on it after dark.
Separate surface haze from faults inside the lamp
Wash the outside lens gently and dry it before inspecting it in daylight. Look for a dull outer surface, chips, cracks and signs of damage to surrounding bodywork. Inspect both lights rather than assuming matching age means matching condition. A dirty lens may look much better after ordinary cleaning without needing abrasive treatment.
Haze inside the housing, damaged reflective surfaces and failed light sources are different problems. Persistent droplets or water pooling inside call for inspection of seals and ventilation. Do not drill holes, apply household sealant or sand the outside simply because moisture is visible behind the lens.
The headlight bulb guide helps distinguish a replacement light source from a lens treatment. Some lamp assemblies need specialist work, so check the handbook before attempting to open covers or disconnect parts.
Read the whole kit process before starting
Restoration kits may use cleaning, progressively finer abrasives, polishing and a protective finish. The exact sequence depends on the kit. Check that it is intended for your lens material and condition, and that you have every required item before wetting or sanding the surface.
Many plastic lenses have a protective surface layer. Abrasive work can remove that layer along with damaged material, so the specified finishing protection matters. A kit promising a quick shine but providing no clear protection instructions deserves closer scrutiny. Do not invent a finishing system by combining unrelated chemicals.
| Observed condition | Useful next step | Limit of a kit |
|---|---|---|
| Dirt or road film | Wash and reassess | Abrasion may be unnecessary |
| External haze on suitable plastic | Check kit compatibility | Requires correct preparation and finishing |
| Cracks or broken mounts | Arrange workshop assessment | Cannot restore structural integrity |
| Water inside or internal damage | Inspect the assembly and seals | Outside polishing cannot reach the fault |
| Uneven or misdirected beam | Check components and alignment | Clarity alone does not correct aim |
Protect the surrounding paint and work area
Park securely in suitable light with the lamps switched off and cool. Work where the kit permits, with the ventilation and protective equipment stated on its label. Keep children and pets away from chemicals and used abrasive sheets. Allow enough time for every step and the final curing period.
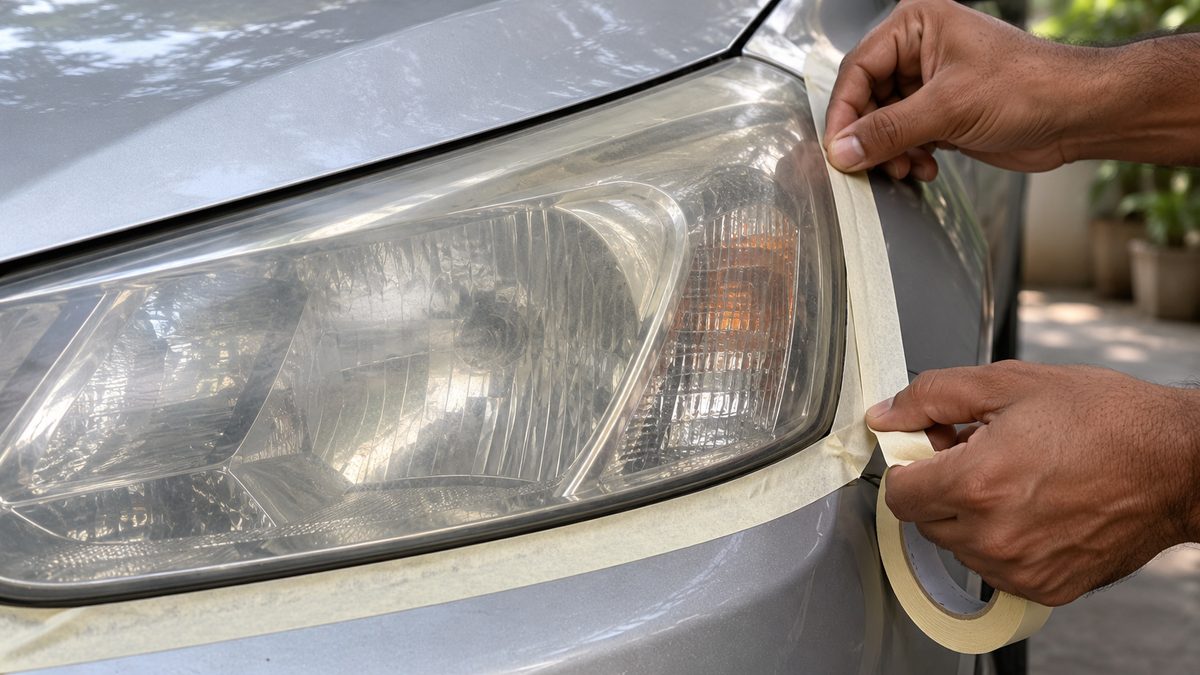
Mask adjacent paint, trim and seals using appropriate materials. Check the tape instructions for sensitive or recently refinished surfaces. Prepare clean cloths and separate them from wheel tools. The wash cloth guide is useful for keeping grit out of a delicate finishing job.
If the process uses a power tool, check that you can control its speed and pressure as required. Do not practise an unfamiliar technique on a curved lens beside painted panels. A hand process is not automatically risk-free either; uneven or excessive abrasion can leave a poor result.
Follow the specified abrasive and coating sequence
Use the grades, working method and lubrication the kit specifies. Do not skip stages to save time or assume a rougher sheet will remove defects more effectively. Clean away residue between steps as directed so you can inspect the surface and avoid carrying coarse particles into the finishing stage.
Stop if you discover cracks, deep damage or a surface that does not match the kit's intended use. More sanding is not a reliable remedy for an unclear diagnosis. Ask a workshop before continuing, particularly if the lamp has an unusual coating or previous repair.
Apply the final protective treatment under its stated conditions. Dust, moisture and handling during curing can affect the finish. Arrange the job around a dry sheltered period when possible, and keep the car out of service for any required interval rather than rushing because the lens already looks clear.
Check the light after the cosmetic work
Once the treatment has cured, remove masking as instructed and inspect for residue, missed areas or chemical contact with surrounding surfaces. Check all lighting functions while parked. A brighter appearance against a nearby wall does not verify the beam aim or road performance.
Have alignment checked if the beam seems uneven, the housing was disturbed or road illumination remains poor. Use the correct specified lighting components. For modifications or replacement assemblies, check the current rules where you drive and consult official guidance rather than relying on a seller's claim.
Choose replacement when the assembly is compromised
A cracked lens, damaged mounting or internal deterioration can make a surface kit the wrong purchase. Ask for a diagnosis and an appropriate replacement specification. Confirm that seals, fixings and aiming are addressed during installation, rather than judging the repair only by how new the lamp looks.
For the rest of the seasonal inspection, use the winter fog driving gear checklist. Clean lamps and sound lenses support visibility, but they do not remove the need to slow down or postpone travel when conditions are unsafe.
What to look for when you buy
Lens restoration kit
Explicit lens compatibility and a complete finishing protection step.
Masking supplies
Paint-safe tape and coverage suitable for adjacent trim.
Workshop assessment
Inspection of lens damage, seals, light output and beam aim.
Frequently asked questions
Can I restore a glass headlight with a plastic-lens kit?
Only if the kit expressly permits that material and application. Do not assume abrasive steps intended for plastic are appropriate for glass.
Should I remove the lamp to restore it?
Follow the approved procedure. Removal may disturb wiring, seals and alignment, so ask a workshop if the job requires dismantling.
Can I drive immediately after applying the final coating?
Follow that coating’s curing instructions, including restrictions on water, dust and handling. Plan alternative travel if needed.
Will restoration remove scratches from a collision?
Not necessarily. Impact damage needs assessment for cracks, broken mounts and other faults, even if the surface can be polished.
Should both headlights be replaced together?
Ask the workshop about the condition and specification of both units. A matching appearance alone does not determine the repair required.
More guides
Car care gear
Car Air Fresheners: Placement, Heat and Cabin Care
Use cabin fragrance cautiously around heat, children and pets. Check placement, prevent leaks and remove odour sources before adding scent.
Car care gear
Post-Diwali Smog: How to Manage the Air Inside Your Car
A closed window and a clean filter help, but neither seals out every pollutant. Start with the ventilation system already fitted to your car.
Car care gear
Car Cleaning After Diwali: Remove Ash Without Scratching
A rinse-first cleaning routine for the morning after Diwali, with separate steps for paint, glass and the cabin.